A dimming switch can make a reading lamp feel unreliable, especially when the light flickers, stays bright, or refuses to turn on. If you are searching for “How to fix a dimming switch on a reading lamp?”, begin with a calm, structured inspection. The fault may involve the dimmer, bulb, socket, plug, or internal wiring. It is not always the switch.
Licensed electrician and electrical educator Rex Cauldwell gives practical safety advice: “If you don’t know what you’re doing, don’t do it.” That warning matters here. Unplug the lamp before touching the dimmer housing. Let the bulb cool completely. Check whether the bulb supports dimming, because many LED bulbs flicker with incompatible controls. Look for a loose knob, cracked casing, burnt odor, darkened plastic, or warm wiring. Small details matter.
Start simply.
A multimeter can help test continuity, but only when used correctly. Do not bypass the dimmer as a quick experiment. That shortcut can hide a damaged conductor or create a shock hazard. Some lamps use rotary controls, while others use slide or touch dimmers. Their replacement parts are not interchangeable. Take a clear photograph before disconnecting anything. Label each wire carefully. Still, photographs can mislead when colors have faded or earlier repairs were poorly made. That is one limitation worth admitting.
This guide explains safe checks, compatible replacement options, and signs that professional service is necessary. If you notice scorching, sparking, exposed copper, or repeated breaker trips, stop immediately. A reading lamp is small, but its electrical risks are real.
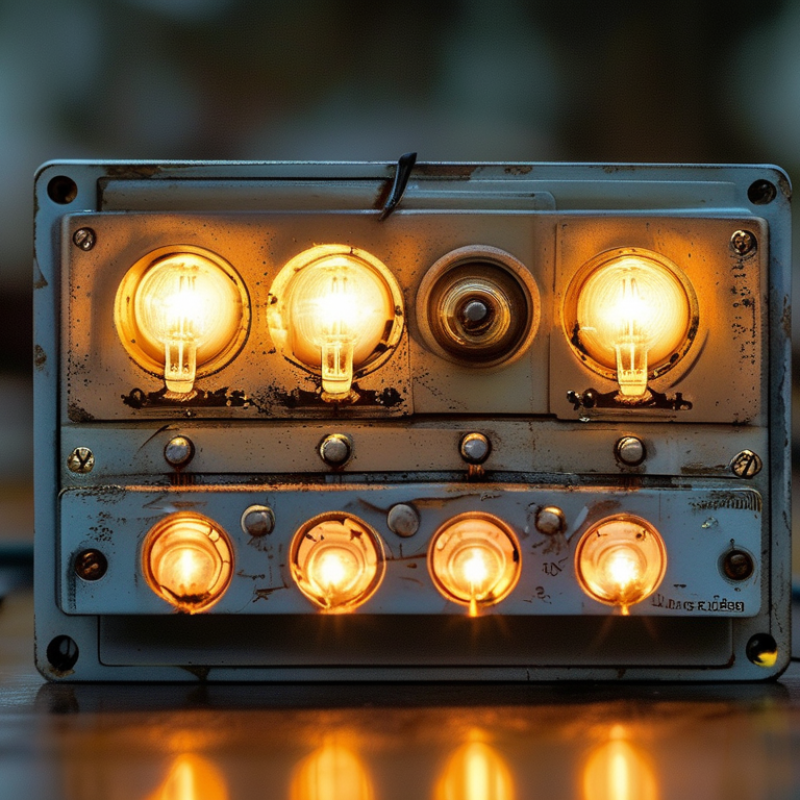
A dimming reading lamp usually signals a problem in the control, bulb, socket, or power connection. Begin by observing the symptom carefully. Does the light fade slowly, flicker, or remain weak at every setting? A steady low output often points to an unsuitable bulb or a worn dimmer. Flickering may suggest loose contact, overheating, or internal component failure.
Unplug the lamp before touching the shade, bulb, or dimmer assembly. Check whether the bulb is firmly seated and rated for dimming. Some bulbs illuminate normally but perform poorly with older controls. Inspect the cord for flattened areas, cuts, or unusual warmth. Gently move the plug near the outlet. If the lamp reacts, the plug or socket may have a poor connection. Do not ignore a burning smell. Stop using the lamp.
A simple test can isolate the cause. Install a known compatible bulb, then try the lamp in another outlet. If the dimming problem remains, the switch is a likely suspect. Dust can also collect around the control, although cleaning rarely fixes a failing electronic part. I once blamed the bulb too quickly and overlooked a loose socket contact. That mistake taught me to test one variable at a time. A mechanical dimmer may need replacement, while a sealed electronic control usually requires professional service. Never bypass the switch or handle exposed wiring. A qualified electrician should inspect persistent flickering, heat, sparks, or damaged insulation.
A dimming switch can fail from wear, dust, heat, or a loose connection. Before touching it, unplug the reading lamp from the wall. Do not trust the switch alone; internal parts may remain energized in some designs. The U.S. Consumer Product Safety Commission estimates that electrical products are linked to roughly 400 electrocution deaths each year. That figure makes a simple inspection worth treating seriously.
Let the lamp cool completely, then move it onto a dry table with bright lighting. Remove books, fabric, and metal objects from the work area. Check the plug, cord, and socket for cuts, melted plastic, dark marks, or a sharp burnt smell. A flickering lamp is a warning, not a minor annoyance. The National Fire Protection Association’s Home Structure Fires research identifies electrical distribution and lighting equipment as recurring contributors to residential fires. I once assumed a warm dimmer was normal; that assumption was careless.
If the cord looks damaged, stop there. Do not test the switch while the lamp is connected. For a removable dimmer module, photograph the wiring before opening the housing, and keep small screws in a dish. Never bypass the dimmer with loose wire. If insulation is brittle, terminals are scorched, or the lamp has a sealed control assembly, use a qualified electrical professional. The inspection may reveal less than expected. That is still useful evidence.
Unplug the lamp before inspection. The chart below shows the recommended safety checks and the condition that should be confirmed before examining the dimming switch.
Safety note: A properly unplugged lamp should have no mains power present. Do not bypass the switch or continue if wiring is damaged, overheated, loose, or visibly burned.
A dimming reading lamp often fails inside the switch housing, not in the bulb.
Unplug the lamp before touching it. Do not rely on the wall switch alone.
Place the lamp on a clear table, then remove the small screws holding the housing together. Keep the screws in a dish. They are easy to lose.
Open the housing gently, because thin plastic clips can break without warning. Photograph the internal connections before moving any wire. Look for loose terminals, darkened copper, melted insulation, or a wire pulled from its clamp. A secure connection should sit firmly under its terminal screw. Bare copper should not extend beyond the terminal area. If the dimmer uses a small circuit board, inspect it for cracked solder joints or scorch marks. Do not touch components while the lamp is connected.
A loose wire can sometimes be tightened, but damaged insulation requires replacement by a qualified repair professional. Never twist wires together and cover them with ordinary tape. That repair is unreliable. I have seen careful inspections miss a terminal that looked secure but moved under light pressure. Test each connection gently, without forcing it. If the housing shows heat damage, replace the complete switch assembly with a compatible, safety-approved part. Reassemble the housing before reconnecting power, and stop immediately if you notice smoke, odor, sparking, or unusual heat.
How to Fix a Dimming Switch on a Reading Lamp?
Replace the Faulty Dimmer Switch with a Compatible Component
A flickering reading lamp often has a worn dimmer switch. Dust, heat, and repeated turning can damage its internal control. Unplug the lamp before touching any wiring. Never work on a connected lamp.
Check the old switch carefully. Note the wire positions, mounting size, and electrical ratings printed on its body. The replacement must match the lamp’s voltage and maximum wattage. It must also support the bulb type, especially if the lamp uses an LED bulb. Some dimmers work only with dimmable LEDs. Compatibility matters.
Take a clear photo before disconnecting anything. It helps prevent a careless wiring mistake. Remove the shade, bulb, and switch housing if needed. Release the old component, then connect each wire to the same terminal on the new switch. Tighten the terminals firmly, but do not crush the wire. A loose connection may create heat.
Test the lamp with a bulb rated for dimming. Turn the control slowly and watch for flickering, buzzing, or unusual warmth. Stop immediately if any appear. I once assumed a universal dimmer would fit a small lamp, but its housing was too deep. The switch pressed against the frame. That mistake showed me why measurements matter.
If the lamp has damaged insulation, brittle wires, or unfamiliar internal parts, ask a qualified electrician for help. A compatible component should fit securely and operate smoothly. Safety comes before convenience.
| Inspection Item | Typical Finding | Recommended Action | Safety or Compatibility Check |
|---|---|---|---|
| Power isolation | The lamp remains connected to the wall outlet while the switch is being inspected. | Unplug the lamp before opening the switch housing or touching any wiring. | Never rely only on the dimmer’s OFF position to remove electrical power. |
| Visible switch condition | Cracked casing, discoloration, melted plastic, loose control, or a burning smell. | Stop using the lamp and replace the complete faulty dimmer component. | Do not reuse a switch showing heat or arcing damage. |
| Symptom: no response | The lamp does not turn on or off when the knob, slider, or wheel is moved. | Check the bulb and power cord first; if they work correctly, replace the dimmer. | A failed dimmer should not be bypassed unless the lamp is redesigned by a qualified person. |
| Symptom: flickering | Light output fluctuates when the control is held steady. | Test with a known-good compatible bulb; replace the dimmer if flickering continues. | Some LED bulbs require a dimmer specifically rated for LED loads. |
| Bulb compatibility | The bulb works normally without dimming but flickers or shuts off while dimming. | Use a dimmable bulb that matches the replacement dimmer’s load requirements. | Non-dimmable bulbs must not be used with a dimming circuit. |
| Electrical ratings | The old switch has a voltage or wattage rating printed on its housing or label. | Select a replacement with the same supply-voltage rating and an equal or higher permitted load rating. | Use the lamp’s local electrical standard and the ratings printed on the original component. |
| Switch type | The original part may be an inline cord dimmer, rotary control, slide control, or touch control. | Choose a replacement with the same installation style and equivalent control function. | A wall dimmer is not automatically suitable for an appliance cord. |
| Wire identification | The switch has two or more conductors connected inside the housing. | Photograph and label each connection before removal, then transfer wires to the matching terminals. | Wire colors and terminal arrangements vary by region and lamp design; follow the component instructions. |
| Mechanical fit | The replacement switch does not sit securely in the cord or original housing. | Use a component with a matching cord diameter, strain relief, enclosure size, and mounting method. | The cord must be protected from pulling, twisting, and sharp edges. |
| Terminal security | A conductor moves under the terminal screw or is partly exposed outside the terminal. | Reconnect the conductor securely and ensure no bare wire is exposed beyond the terminal area. | Loose connections can create resistance, heat, arcing, and fire risk. |
| Final assembly | The switch cover or housing is not fully closed after replacement. | Close and fasten the housing so that terminals and live parts cannot be touched. | Do not operate the lamp with exposed wiring or a damaged enclosure. |
| Functional test | The lamp turns on, turns off, and changes brightness smoothly after installation. | Test the control at low, medium, and high settings while checking for heat, noise, odor, or flicker. | Unplug the lamp immediately if abnormal heat, crackling, smoke, or burning odor occurs. |
| When to seek professional help | The cord, plug, socket, insulation, or internal wiring is damaged or difficult to identify. | Have the lamp inspected or repaired by a qualified electrician or competent repair technician. | Do not perform live electrical testing or modify mains wiring without appropriate training. |
After repairing a dimming switch, reassemble the reading lamp with the power disconnected. Keep the wiring diagram or your earlier photos nearby. Attach each wire to its original terminal, then tighten the screws firmly without crushing the conductors. Check that no bare copper extends beyond the terminal. Small details matter.
Fit the switch housing together and align the dimmer knob with its shaft. The knob should turn smoothly from low to high. Secure the lamp base, shade, and strain relief before testing. I once tightened a housing too quickly and trapped a wire under its edge. The switch worked, but the cable insulation was damaged. I had to reopen the lamp and correct it. Slow inspection is better than repeating the repair.
Test the lamp in a clear, dry area. Plug it in only after confirming that the casing is closed. Turn the dimmer gradually, watching for flickering, buzzing, delayed response, or sudden brightness changes. Test the lowest setting for several seconds, then increase the light slowly. Touch the housing carefully after a short run; unusual heat means stop using it. A reliable dimming switch should provide steady light across its range. If the lamp remains unstable, disconnect it and inspect the connections again. Some switches cannot be repaired safely and require replacement by a qualified technician.
: The cause may involve the bulb, dimmer, socket, cord, or outlet. Steady weakness suggests incompatibility or wear. Flickering may indicate loose contact, heat, or internal failure.
Unplug the lamp before touching the bulb, shade, switch, or wiring. Work only on a dry, clear surface. Never handle exposed wires.
Install a known compatible, dimmable bulb. Then test the lamp in another outlet. Change one variable at a time. I once blamed the bulb too quickly.
Gently move the plug near the outlet. If the brightness changes, the plug or socket may connect poorly. A loose socket contact can mimic a faulty bulb.
Match the voltage, maximum wattage, mounting size, and bulb type. The switch must support dimmable bulbs when required. Measure the housing depth carefully. Universal does not mean suitable.
Photograph the existing connections before disconnecting anything. Record each wire’s terminal position. Attach every wire to the matching terminal. Tighten screws firmly, without crushing conductors.
Reassemble the casing before reconnecting power. Turn the control slowly from low to high. Watch for flickering, buzzing, delayed response, or sudden brightness changes. Test the lowest setting briefly.
Stop immediately if you notice burning smells, sparks, damaged insulation, or unusual heat. Persistent instability needs inspection by a qualified electrician. Safety comes before convenience.
How to fix a dimming switch on a reading lamp? Start by identifying the source of the problem. Check whether the lamp’s bulb, power cord, plug, or dimming behavior shows signs of damage or wear. Turn the lamp off, unplug it from the outlet, and prepare a clean, well-lit workspace before inspecting the switch. Safety should remain the priority throughout the repair.
Carefully open the switch housing and examine the internal wires, terminals, and contacts for loose connections, scorching, or broken parts. If the dimmer is defective, replace it with a compatible component that matches the lamp’s electrical specifications. Secure every connection, close the housing firmly, and ensure no wires are pinched. After reassembly, plug the lamp in and test the dimming function gradually. If the wiring appears damaged or the repair is unclear, stop and consult a qualified electrician.

LuxPower Light