Installing lighting can enhance any space. Yet, some installations require drilling, which can be a hassle. Many people seek simpler solutions. So, how to install a magnetic under cabinet light without drilling? This method offers convenience and flexibility.
Magnetic under cabinet lights are easy to use. They come with adhesive or magnetic strips. This allows for attachment without harming surfaces. Homeowners can reposition the lights easily for optimal brightness. The installation involves minimal tools, typically just cleaning the surface before applying. Remember, if the adhesive doesn't stick well, you may need to clean the area again.
Finding the right product is crucial. For example, the light's brightness and battery life should meet your needs. Think about where and how often you will use these lights. Some options may not provide sufficient light or last long. Weighing these factors is important. Consider experimenting with different brands to find the best fit.
Magnetic under cabinet lights are an excellent choice for modern homes. They provide bright illumination without the hassle of complicated wiring. These lights are easy to install, making them perfect for anyone looking to enhance their kitchen or workspace. Their sleek design allows them to fit seamlessly under cabinets, adding both style and functionality.
When installing magnetic under cabinet lights, consider a few tips. First, clean the surface thoroughly before applying the magnetic strips. This ensures the lights adhere better. Second, since no drilling is involved, ensure you choose a surface that is flat and stable. It prevents any accidental falls. Lastly, think about the positioning. Place the lights where they will cast light effectively without causing shadows.
You will find that these lights are lightweight and portable. They can be easily removed and repositioned if needed. However, keep in mind that if you move them too often, the adhesive may weaken. Experiment with different placements to find the best location that suits your needs. In the end, proper installation leads to better lighting and enhances the overall mood of your space.
Installing magnetic under cabinet lights without drilling can be a smart decision. No-dig methods offer multiple benefits. First, they save you time and effort. You don’t need tools or heavy equipment. Simply peel, stick, and attach. This makes the process straightforward and quick.
Another advantage is the ability to avoid damage. Traditional installation often leaves marks or requires patching. No-drill installations keep your cabinets pristine. This is particularly helpful for renters. They can enjoy better lighting without risking their deposit. Flexibility is another perk. You can easily relocate the lights if needed.
While no-drill methods are convenient, they might not suit every situation. Some users find that adhesive may weaken over time. In humid environments, the lights may not stay put. It’s essential to choose the right adhesive for your specific space. Regular checks can prevent dissatisfaction later on.
When installing magnetic under cabinet lights, having the right tools is essential. You will need adhesive strips or double-sided tape. These materials allow for an easy, non-damaging installation. A measuring tape ensures proper placement under your cabinets. A level is also useful to prevent crooked lighting.
Gathering your materials will save time during installation. If you're unsure, consider practicing the placement of the lights before sticking anything down. You might want to experiment with different angles for better lighting.
Tips to remember: Make sure surfaces are clean. Dust can affect adhesion. Also, give the adhesive time to cure before testing the lights. Lastly, don’t rush! Take your time to ensure everything is aligned properly. A little patience will yield better results.
Installing magnetic under-cabinet lights can elevate your kitchen or workspace. This process is straightforward and avoids the need for drilling. Start by selecting a suitable location for the lights. Consider areas that need extra illumination. Measure carefully to ensure an even look.
After choosing the spot, clean the surface thoroughly. Dust or grease can hinder adhesion. Next, you can attach the magnetic strips. The magnets should align with the light fixtures. Press firmly to ensure they stick well. The installation may feel a bit tricky at times. Adjust as needed until the lights are level.
Once the lights are in place, plug them in. Test the functionality to confirm they work properly. It can be frustrating if they don’t operate as expected. Take a moment to recheck connections. Small adjustments might improve performance. This simple, no-drill method can provide a sleek lighting solution. Make sure to reflect on your choices for effective placement.
| Step | Action | Materials Needed | Time Estimate |
|---|---|---|---|
| 1 | Choose the Location | None | 5 minutes |
| 2 | Clean the Installation Surface | Cloth, Cleaning Solution | 10 minutes |
| 3 | Attach Magnetic Strips | Magnetic Strips, Tape | 15 minutes |
| 4 | Install the Light | Magnetic Under Cabinet Light | 10 minutes |
| 5 | Test the Light Functionality | None | 5 minutes |
| 6 | Adjust as Necessary | None | 10 minutes |
When positioning magnetic lights under your kitchen cabinets, consider the layout and usage of your space. Think about areas where you need light the most. Position the lights near the countertop for cooking tasks. This ensures you have adequate visibility while preparing meals.
Securing the lights can be tricky. A strong adhesive or magnetic strip will help. Make sure the surface is clean before applying. Test the light's placement before securing it permanently. Magnetic lights need to be easily accessible for battery changes. Keep this in mind while positioning. Sometimes, they might not adhere well on uneven surfaces, which is frustrating.
Adjusting the angle of the lights can maximize their effectiveness. Experiment with different placements. Sometimes, moving a light just an inch can make a big difference. Be willing to reassess your setup. It’s okay to try different positions until you find the best one. Lighting should enhance the atmosphere and functionality of your kitchen.
: They provide bright illumination and are easy to install without complicated wiring.
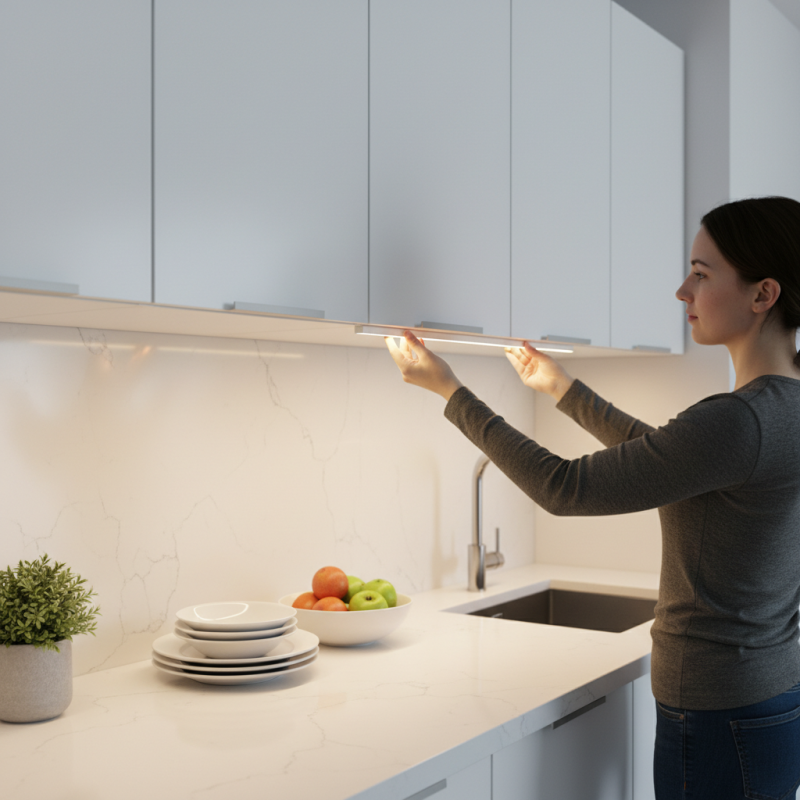
Clean the surface thoroughly, attach magnetic strips, and ensure they align with the light fixtures.
Flat and stable surfaces are ideal to prevent accidental falls.
Yes, they are lightweight and portable, but frequent movement may weaken the adhesive.
Position lights near the countertop for better visibility while cooking or working.
Check connections, and make small adjustments to improve performance.
Adjust their angle and experiment with placements for optimal illumination.
Dust and grease can hinder adhesion, making it difficult for the lights to stick properly.
If shadows occur or visibility is poor, reassess the setup and try different positions.
In the article titled "How to Install Magnetic Under Cabinet Light Without Drilling Tips for 139th Canton Fair?", readers are guided through the benefits of using magnetic under cabinet lights, particularly emphasizing no-drill installation methods. These techniques offer a hassle-free solution for enhancing home lighting without the need for tools that can damage surfaces.
The article outlines the essential tools and materials required for installation, followed by a step-by-step guide detailing how to install a magnetic under cabinet light without drilling. It also includes helpful tips for positioning and securing the lights to ensure optimal functionality and aesthetic appeal. Overall, this guide serves as a practical resource for anyone asking, "How to install a magnetic under cabinet light without drilling?
LuxPower Light